在生信工作中使用 agent
最近 agent 很火,我也一直在用,我一直希望把它应用在生信分析的过程中,毕竟能够增加生产力的工具才是最好的工具,我们这个专业也很少会做开发相关的工作,大都是写一些脚本啥的,这也是适合使用 agent 的一个场景。
我使用的是 Claude Code+DeepSeek API,当然,还有一些其他的如 Claude Opus 和 GPT,但是谁让 DeepSeek 便宜呢 ... 所以大部分的场景下还是用 DeepSeek。
Claude Code 配置
首先我们需要在服务器上安装 Claude Code 客户端,官网的安装脚本很显然是不适合国内的服务器和集群的,所以我们曲线救国,使用 conda 环境安装 npm 来安装 Claude Code:
conda create -n claude
conda install conda-forge::nodejs
npm config set registry https://registry.npmmirror.com
npm install -g @anthropic-ai/claude-code
后续更新:
npm update -g @anthropic-ai/claude-code然后设置环境变量,在 DeepSeek 开放平台注册充值然后获取 API key,然后将下列内容写入~/.bashrc:
export ANTHROPIC_BASE_URL=https://api.deepseek.com/anthropic
export ANTHROPIC_AUTH_TOKEN=<your DeepSeek API Key>
export ANTHROPIC_MODEL=deepseek-v4-pro[1m]
export ANTHROPIC_DEFAULT_OPUS_MODEL=deepseek-v4-pro[1m]
export ANTHROPIC_DEFAULT_SONNET_MODEL=deepseek-v4-pro[1m]
export ANTHROPIC_DEFAULT_HAIKU_MODEL=deepseek-v4-flash
export CLAUDE_CODE_SUBAGENT_MODEL=deepseek-v4-flash
export CLAUDE_CODE_EFFORT_LEVEL=max
如果你有多个 key 想要动态切换,那么可以使用下面的bash函数:
ccapi() {
    unset ANTHROPIC_BASE_URL ANTHROPIC_AUTH_TOKEN API_TIMEOUT_MS ANTHROPIC_MODEL ANTHROPIC_DEFAULT_OPUS_MODEL ANTHROPIC_DEFAULT_SONNET_MODEL ANTHROPIC_DEFAULT_HAIKU_MODEL CLAUDE_CODE_SUBAGENT_MODEL CLAUDE_CODE_EFFORT_LEVEL CLAUDE_CODE_ATTRIBUTION_HEADER
    export CLAUDE_CODE_DISABLE_NONESSENTIAL_TRAFFIC=1

    case $1 in
        "deepseek")
            export ANTHROPIC_BASE_URL="https://api.deepseek.com/anthropic"
            export ANTHROPIC_AUTH_TOKEN="<your API Key>"
            export ANTHROPIC_MODEL="deepseek-v4-pro[1m]"
            export ANTHROPIC_DEFAULT_OPUS_MODEL="deepseek-v4-pro[1m]"
            export ANTHROPIC_DEFAULT_SONNET_MODEL="deepseek-v4-pro[1m]"
            export ANTHROPIC_DEFAULT_HAIKU_MODEL="deepseek-v4-flash"
            export CLAUDE_CODE_SUBAGENT_MODEL="deepseek-v4-flash"
            export CLAUDE_CODE_EFFORT_LEVEL="max"
            echo "Switched to deepseek"
            ;;
        "xiayh")
            export ANTHROPIC_BASE_URL="http://186.244.210.51:8080"
            export ANTHROPIC_AUTH_TOKEN="<your API Key>"
            export CLAUDE_CODE_ATTRIBUTION_HEADER=0
            echo "Switched to xiayh"
            ;;
        "tokenwork")
            export ANTHROPIC_BASE_URL="https://tokenwork.app"
            export ANTHROPIC_AUTH_TOKEN="<your API Key>"
            export ANTHROPIC_MODEL="gpt-5.2"
            export ANTHROPIC_DEFAULT_HAIKU_MODEL="gpt-5.2"
            echo "Switched to tokenwork"
            ;;
        *)
            echo "Usage: ccapi [deepseek|xiayh|tokenwork]"
            ;;
    esac
}

_ccapi_completions() {
    local cur="${COMP_WORDS[COMP_CWORD]}"
    COMPREPLY=( $(compgen -W "deepseek xiayh tokenwork" -- "$cur") )
}

complete -F _ccapi_completions ccapi
在使用 Claude Code 之前选择 key 即可:
ccapi deepseek使用场景
最多的场景当然还是跑流程了,使用 agent 的话主要需要注意下面的问题:
- 不能让 agent 读入原始数据,否则动辄几百 MB 的数据会有很长的上下文,而且烧 token ... 所以不能直接使用
/init去初始化项目,只需要告诉 agent 你的数据路径就行了 - 要让 agent 清楚你的机器是怎样的配置,比如 conda 环境、slurm 作业系统的情况等等
- 不能让 agent 有权利去删除数据文件
因此我们要让 agent 去阅读我们以前的流程脚本,让它获取跑流程最需要的那些信息,并且生成说明文档CLAUDE.md:
(claude) [jiaoyuan@login01 analysis]$ claude
 ▐▛███▜▌   Claude Code v2.1.148
▝▜█████▛▘  deepseek-chat · API Usage Billing
  ▘▘ ▝▝    ~/03.palv_scrna/analysis

  Opus 4.7 xhigh is now available! · /model to switch

❯ 查阅当前文件夹下所有的。sh 和。py 脚本,了解本项目的完整流程,你要将各种数据的路径记录下来,还有 conda 环境、slurm 系统的信息等等,不要直接阅读原始数据,注意一定要仅仅阅读代码,严令禁止直接阅读
  原始数据,原始数据可以根据拓展名去调用对应的工具去查看格式等,将这些信息写入 CLAUDE.md

  Searched for 1 pattern, read 22 files, listed 3 directories (ctrl+o to expand)

● 现在我已经完整掌握了整个项目。让我写入 CLAUDE.md。

● Write(CLAUDE.md)
  ⎿  Wrote 167 lines to CLAUDE.md
       1 # PAL scRNA-seq Analysis Project
       2
       3 ## 物种
       4 **Populus alba × Populus glandulosa** (银白杨 × 腺杨), 简称 "pal"。
       5
       6 ## 计算环境
       7
       8 ### Conda
       9 - **环境名**: `scrna2`
      10 - **基础路径**: `/public/home/jiaoyuan/00.pipeline/miniforge3`
     … +157 lines (ctrl+o to expand)

● 已完成 CLAUDE.md 的编写。我完整阅读了本项目所有代码(6 个 .sh + 6 个 .R 主流程脚本、4 个 others/ 备用脚本、split.R、test.R、env.yml),记录了以下关键信息:

  项目概览:杨树(Populus alba × Populus glandulosa)单细胞转录组分析,30 个文库覆盖 8 种组织(子叶、叶、根、茎、雄花、雌花、花粉、茎尖)。

  6 步主流程:
  1. 01.remove_doublet — DoubletFinder 去双细胞
  2. 02.harmony — Harmony 整合 + 聚类 + UMAP
  3. 03.cell_umap — 标记基因查找与组织组成分析
  4. 04.umap_composition_qc — QC 统计与可视化
  5. 05.marker_plot — 外部 marker 注释 DotPlot
  6. 06.metaneighbor — MetaNeighbor 细胞类型验证

  环境与路径:
  - Conda 环境 scrna2,R 4.3.3 + Seurat 5.3.0
  - Slurm 分区 hebhcnormal01,CPU 16-40 核,内存 48G-140G
  - 数据路径、基因列表、中间/最终输出文件均已详细列出
  - 细胞类型注释映射表(52 种细胞类型)也包含在内

✻ Crunched for 48s

❯ 请你检查 04.umap_composition_qc.R 的代码是否正确,完善脚本并且使用 slurm 作业系统提交任务

(agent 自动检查并完善了 R 脚本,详见下方总结)

● R 脚本已完善。现在提交 Slurm 任务。

● Bash(sbatch 04.umap_composition_qc.sh)
  ⎿  Submitted batch job 25082486

● Bash(squeue -u jiaoyuan)
  ⎿               JOBID PARTITION      NAME           USER           ST       TIME  NODES NODELIST(REASON)
               25082486 hebhcnormal01  umap_comp_qc   jiaoyuan       PD       0:00      1 (Priority)
               25082458 hebhcnormal01  qc_plot        jiaoyuan        R       9:14      1 b103r7n8

● 任务已提交(Job ID: 25082486),目前排队等待调度中。

  代码完善内容总结:

  1. 添加 set.seed(42) — 保证随机过程可重复
  2. 添加输入文件检查 — harmony.rds 不存在时给出明确提示
  3. 统一配色方案 — 使用 pals::alphabet2() 替代 scales::hue_pal(),与 step 2 (02.harmony.R) 保持一致
  4. 尝试自动计算 percent.mt — 读取 Pal_MT_gene_list.csv,分别尝试按 ID 和 Gene 列匹配线粒体基因,匹配到 >=10 个基因时才计算,否则跳过
  5. 改进 QC 图标题 — 使用 "Genes per Cell"、"UMI Count per Cell"、"Mitochondrial (%)" 替代原始列名
  6. 添加 expand 参数 — 防止箱线图被裁切
  7. 添加运行日志 — 每个步骤输出 [INFO] 提示,方便查看进度

✻ Worked for 1m 7s

──────────────────────────────────────────────────────────────────────────────────────────────────────────────────────────────────────────────────────────────────────────────────────────────
❯
──────────────────────────────────────────────────────────────────────────────────────────────────────────────────────────────────────────────────────────────────────────────────────────────
  ? for shortcuts
等 agent 清楚这些问题了以后再让它去修改流程或者提交任务就会变得简单很多,我把开头的提示词用 AI 润色补充了一下,贴出来:
请分析当前目录下所有的 .sh、.py、.R 脚本,以及其他生信常用格式脚本(如 .pl、.awk、.nf、.smk 等),梳理本生信项目的完整工作流,并将梳理结果写入 CLAUDE.md。

需要重点提取并记录以下信息:
1. 项目的完整处理流程(上下游步骤关系、主入口脚本及标准的启动命令)
2. 各种输入数据、中间结果、最终输出结果的存放路径
3. 运行日志(log)及报错文件(stderr/stdout)的输出路径
4. 依赖的参考基因组、注释文件(GTF/GFF)、索引或公共数据库的路径
5. 核心工具的调用方式及其关键硬编码参数(如质控阈值、比对参数、统计显著性阈值等)
6. 依赖的 Conda 环境信息、Docker/Singularity 镜像或通过 module load 加载的软件信息
7. Slurm 任务提交系统的配置参数(如分区/队列、节点数、内存、时间等)

严令限制:
绝对禁止直接读取或打印原始数据文件全文!如果为了解数据结构必须查看原始数据,请仅根据数据文件的扩展名,调用合适的命令行工具(如 head、zcat | head、samtools view 等)仅抽查前几行格式。
如果你觉得麻烦,可以将其写到 markdown 文档,然后作为 agent 的 skill,放在.claude/skills/。
说到 skills,这里你也可以选择添加 skills,使用 npx 从 GitHub 安装,npx 在安装 nodejs 的时候就自带了的,但是一般国内的服务器不好通 GitHub,不慌,使用 git 的 url.insteadOf 配置将 GitHub 请求自动重写到镜像站:
git config --global url."https://github.jiaoyuan.org/https://github.com/".insteadOf "https://github.com/"然后去安装:
npx skills add NousResearch/hermes-agent这样就解决了 GitHub 的网络连接问题。
GitHub 代理也可以自建,使用下面的脚本,导入到 Cloudflare workers 部署绑定域名即可:
// proxyfox — Cloudflare Workers
// To deploy: copy-paste this file into Workers online editor, Save and Deploy.
// To config: change jsdelivr (true/false) and whiteList ([] = allow all) below.

interface Config {
  jsdelivr: boolean;
  whiteList: string[];
  prefix: string;
}

type RouteAction =
  | { type: 'proxy'; url: string }
  | { type: 'redirect'; url: string; status: number };

const PREFIX = '/';

const config: Config = {
  jsdelivr: false,
  whiteList: [],
  prefix: PREFIX,
};

const exp1 = /^(?:https?:\/\/)?github\.com\/.+?\/.+?\/(?:releases|archive)\/.*$/i;
const exp2 = /^(?:https?:\/\/)?github\.com\/.+?\/.+?\/(?:blob|raw)\/.*$/i;
const exp3 = /^(?:https?:\/\/)?github\.com\/.+?\/.+?\/(?:info|git-).*$/i;
const exp4 = /^(?:https?:\/\/)?raw\.(?:githubusercontent|github)\.com\/.+?\/.+?\/.+?\/.+$/i;
const exp5 = /^(?:https?:\/\/)?gist\.(?:githubusercontent|github)\.com\/.+?\/.+?\/.+$/i;
const exp6 = /^(?:https?:\/\/)?github\.com\/.+?\/.+?\/tags.*$/i;

const ALL_PATTERNS = [exp1, exp2, exp3, exp4, exp5, exp6] as const;

function checkUrl(u: string): boolean {
  return ALL_PATTERNS.some(exp => u.search(exp) === 0);
}

function route(path: string): RouteAction | null {
  if ([exp1, exp5, exp6, exp3].some(exp => path.search(exp) === 0)) {
    return { type: 'proxy', url: path };
  }
  if (path.search(exp2) === 0) {
    if (config.jsdelivr) {
      const cdn = path
        .replace('/blob/', '@')
        .replace(/^(?:https?:\/\/)?github\.com/, 'https://cdn.jsdelivr.net/gh');
      return { type: 'redirect', url: cdn, status: 302 };
    }
    return { type: 'proxy', url: path.replace('/blob/', '/raw/') };
  }
  if (path.search(exp4) === 0) {
    if (config.jsdelivr) {
      const cdn = path
        .replace(/(?<=com\/.+?\/.+?)\/(.+?\/)/, '@$1')
        .replace(/^(?:https?:\/\/)?raw\.(?:githubusercontent|github)\.com/, 'https://cdn.jsdelivr.net/gh');
      return { type: 'redirect', url: cdn, status: 302 };
    }
    return { type: 'proxy', url: path };
  }
  return null;
}

const PREFLIGHT_INIT: ResponseInit = {
  status: 204,
  headers: {
    'access-control-allow-origin': '*',
    'access-control-allow-methods': 'GET,POST,PUT,PATCH,TRACE,DELETE,HEAD,OPTIONS',
    'access-control-max-age': '1728000',
  },
};

function handlePreflight(request: Request): Response | null {
  if (request.method === 'OPTIONS' && request.headers.has('access-control-request-headers')) {
    return new Response(null, PREFLIGHT_INIT);
  }
  return null;
}

function isWhitelisted(url: string): boolean {
  if (config.whiteList.length === 0) return true;
  return config.whiteList.some(item => url.includes(item));
}

function safeParseUrl(urlStr: string): URL | null {
  try { return new URL(urlStr); } catch { return null; }
}

async function proxyRequest(
  request: Request,
  targetUrl: string,
  maxRedirects = 10,
): Promise<Response> {
  if (!isWhitelisted(targetUrl)) {
    return new Response('blocked', { status: 403 });
  }
  let urlStr = targetUrl;
  if (!/^https?:\/\//.test(urlStr)) urlStr = 'https://' + urlStr;
  const urlObj = safeParseUrl(urlStr);
  if (!urlObj) return new Response('Invalid URL', { status: 400 });
  if (maxRedirects <= 0) return new Response('Too many redirects', { status: 502 });

  const upstream = await fetch(urlObj.href, {
    method: request.method,
    headers: new Headers(request.headers),
    redirect: 'manual',
    body: request.body,
  });

  const resHeaders = new Headers(upstream.headers);
  const location = resHeaders.get('location');
  if (location) {
    if (checkUrl(location)) {
      resHeaders.set('location', config.prefix + location);
    } else {
      return proxyRequest(request, location, maxRedirects - 1);
    }
  }
  resHeaders.set('access-control-expose-headers', '*');
  resHeaders.set('access-control-allow-origin', '*');
  resHeaders.delete('content-security-policy');
  resHeaders.delete('content-security-policy-report-only');
  resHeaders.delete('clear-site-data');
  return new Response(upstream.body, { status: upstream.status, headers: resHeaders });
}

const INDEX_HTML = `<!DOCTYPE html>
<html lang="zh-Hans">
<style>
    html,body{width:100%;margin:0}html{height:100%}body{min-height:100%;padding:20px;box-sizing:border-box}p{word-break:break-all}
    @media(max-width:500px){h1{margin-top:80px}}
    .flex{display:flex;flex-direction:column;justify-content:center;align-items:center}
    .block{display:block;position:relative}
    .url{font-size:18px;padding:10px 10px 10px 5px;position:relative;width:300px;border:none;border-bottom:1px solid #bfbfbf}
    input:focus{outline:none}
    .bar{content:'';height:2px;width:100%;bottom:0;position:absolute;background:#00bfb3;transition:0.2s ease transform;transform:scaleX(0)}
    .url:focus~.bar{transform:scaleX(1)}
    .btn{line-height:38px;background-color:#00bfb3;color:#fff;white-space:nowrap;text-align:center;font-size:14px;border:none;border-radius:2px;cursor:pointer;padding:5px;width:160px;margin:30px 0}
    .tips,.example{color:#7b7b7b;position:relative;align-self:flex-start;margin-left:7.5em}
    .tips>p:first-child::before{position:absolute;left:-3em;content:'PS:';color:#7b7b7b}
    .example>p:first-child::before{position:absolute;left:-7.5em;content:'合法输入示例:';color:#7b7b7b}
</style>
<head>
    <meta charset="utf-8">
    <meta http-equiv="X-UA-Compatible" content="IE=edge">
    <meta name="viewport" content="width=device-width,initial-scale=1.0">
    <script>
        function toSubmit(e){e.preventDefault();window.open(location.href.substr(0,location.href.lastIndexOf('/')+1)+document.getElementsByName('q')[0].value);return false}
        function copyLink(){const u=location.origin+'/'+document.getElementsByName('q')[0].value;navigator.clipboard.writeText(u).then(()=>{const b=document.getElementById('copy-btn');b.textContent='已复制';setTimeout(()=>{b.textContent='复制链接'},1500)}).catch(()=>{const b=document.getElementById('copy-btn');b.textContent='复制失败';setTimeout(()=>{b.textContent='复制链接'},1500)})}
    </script>
    <title>GitHub 文件加速</title>
</head>
<body class="flex">
<a style="position:absolute;top:0;right:0;color:#3294ea;text-decoration:none;padding:8px 12px;font-size:14px" href="https://github.com/imjiaoyuan/proxyfox">Fork me on GitHub</a>
<h1 style="margin-bottom:50px">GitHub 文件加速</h1>
<form action="./" method="get" style="padding-bottom:40px" target="_blank" class="flex" onsubmit="toSubmit(event)">
    <label class="block" style="width:fit-content">
        <input class="block url" name="q" type="text" placeholder="键入Github文件链接"
               pattern="^((https|http):\\/\\/)?(github\\.com\\/.+?\\/.+?\\/(?:releases|archive|blob|raw|suites)|((?:raw|gist)\\.(?:githubusercontent|github)\\.com))\\/.+$" required>
        <div class="bar"></div>
    </label>
    <div style="display:flex;gap:12px">
        <input class="block btn" type="submit" value="下载">
        <button class="block btn" type="button" id="copy-btn" onclick="copyLink()" style="background-color:#526069">复制链接</button>
    </div>
    <div class="tips"><p>GitHub 文件链接带不带协议头都可以,支持 release、archive 以及文件。更多用法、clone 加速请参考 <a href="https://github.com/imjiaoyuan/proxyfox">项目文档</a>。</p><p>注意,不支持项目文件夹</p></div>
    <div class="example"><p>分支源码:https://github.com/user/project/archive/master.zip</p><p>release源码:https://github.com/user/project/archive/v0.1.0.tar.gz</p><p>release文件:https://github.com/user/project/releases/download/v0.1.0/example.zip</p><p>分支文件:https://github.com/user/project/blob/master/filename</p></div>
</form>
<p style="position:sticky;top:calc(100% - 2.5em)">项目基于 Cloudflare Workers,开源于 GitHub <a style="color:#3294ea" href="https://github.com/imjiaoyuan/proxyfox">imjiaoyuan/proxyfox</a></p>
</body>
</html>`;

const FAVICON_SVG = `<svg xmlns="http://www.w3.org/2000/svg" viewBox="0 0 32 32"><rect width="32" height="32" rx="4" fill="#00bfb3"/><text x="16" y="22" text-anchor="middle" font-size="20" font-family="sans-serif" fill="#fff">→</text></svg>`;

function handleStaticFile(pathname: string): Response | null {
  if (pathname === '/' || pathname === '') {
    return new Response(INDEX_HTML, { headers: { 'content-type': 'text/html; charset=utf-8' } });
  }
  if (pathname === '/favicon.ico') {
    return new Response(FAVICON_SVG, { headers: { 'content-type': 'image/svg+xml' } });
  }
  return null;
}

async function handleRequest(request: Request): Promise<Response> {
  const urlObj = new URL(request.url);

  const q = urlObj.searchParams.get('q');
  if (q) return Response.redirect(`https://${urlObj.host}${PREFIX}${q}`, 301);

  const preflight = handlePreflight(request);
  if (preflight) return preflight;

  const staticResp = handleStaticFile(urlObj.pathname);
  if (staticResp) return staticResp;

  const path = urlObj.href
    .slice(urlObj.origin.length + PREFIX.length)
    .replace(/^https?:\/+/, 'https://');

  const action = route(path);
  if (!action) return new Response('Not Found', { status: 404 });

  switch (action.type) {
    case 'proxy': return proxyRequest(request, action.url);
    case 'redirect': return Response.redirect(action.url, action.status);
  }
}

export default { fetch: handleRequest };
比较老的服务器上可能 git 版本比较低,安装 skills 的时候会出现 lfs 的问题,很简单,使用 conda 安装最新的 git 即可,安装到 claude 的环境里面:
conda install anaconda::git除此之外,还可以让 agent 去帮忙搭建环境之类的,但是这个比较耗时间,而且机器不同的话会遇到各种各样的问题,需要我们和 agent 多轮对话之类的才能搞清楚,我就不举例了。
第二个使用场景就是作为我们的本地知识库引擎,我们可以放一系列 pdf 文献,可以使用 pymupdf 和 markdownify 将其转为 md 文档(直接读 pdf 会耗更多 token),虽然它转换的效果不是很好而且比较乱,但是不影响,谁让 AI 读得懂呢?那么初始化以后,agent 就可以根据文献来帮助我们做很多事情了。
可以直接在 claude 的环境里面安装 python 和 pip,然后用 pip 安装 pymupdf 和 markdownify:
conda install python pip
pip install pymupdf markdownify
然后直接让 claude 调用 pymupdf 和 markdownify 把 pdf 转为 md 文档(这里我是自己电脑跑的,所以用的是 uv):
 ▐▛███▜▌   Claude Code v2.1.150
▝▜█████▛▘  deepseek-v4-pro[1m] · API Usage Billing
  ▘▘ ▝▝    ~/projects/sclrref

  Opus 4.7 xhigh is now available! · /model to switch

❯ 本环境中有 pymupdf,是使用 uv 安装的,你使用它将此文件夹下的 pdf 文献转为 md 文档,然后阅读转换后的文献生成 CLAUDE.md

  Searched for 1 pattern, listed 1 directory (ctrl+o to expand)

● 找到 3 个 PDF 文件。pymupdf 不支持直接输出 markdown,agent 自动改用 HTML 提取后转换,过程中遇到缺少依赖的问题也能自行解决(uv pip install markdownify)。

● 三篇 PDF 已转为 markdown。现在让我阅读各文献的关键部分来了解内容。

  Read 3 files (ctrl+o to expand)

● 让我深入了解各文献的方法与结论。

  Searched for 3 patterns, read 3 files (ctrl+o to expand)

● 现在我已对各文献有了深入了解,生成 CLAUDE.md。

● Write(CLAUDE.md)
  ⎿  Wrote 175 lines to CLAUDE.md
       1 # CLAUDE.md — Long-read Single-cell RNA Sequencing Literature Reference
       2
       3 This project contains reference literature on long-read single-cell RNA sequencing (scRNA-seq)
       4 and isoform-level transcriptome analysis. The three papers below cover experimental methods,
       5 computational tools, and biological applications of full-length isoform detection at
       6 single-cell resolution.
       7
       8 ---
       9
      10 ## Paper 1 — Dondi et al. (2024), Nature Communications
     … +165 lines (ctrl+o to expand)

● CLAUDE.md 已生成。来确认一下文件内容。

  Read 1 file (ctrl+o to expand)

● 完成。以下是所做工作的总结:

  转换了 3 份 PDF:
  - 41467_2023_Article_43387.pdf → .md(Dondi 等人,Nature Communications — 卵巢癌长读长 scRNA-seq)
  - btaf664.pdf → .md(Chen 等人,Bioinformatics — IsoDiffR 工具)
  - s41593-024-01616-4.pdf → .md(Joglekar 等人,Nature Neuroscience — 脑部异构体图谱)

  生成的 CLAUDE.md(175 行) 包含:
  - 每篇论文的方法、关键发现及其与本项目的相关性
  - 跨论文主题:长读长测序揭示短读长无法检测的异构体复杂性、异构体表达≠基因表达、异构体的细胞类型特异性、临床相关性,以及异构体分析的计算工具现状

✻ Cooked for 2m 21s

❯ 根据文献来看,目前第三代全长单细胞转录组学的分析通常包括哪些?

● 根据这三篇文献,我将目前第三代全长单细胞转录组学的分析流程归纳为以下几个层面:

  ---
  一、上游:数据预处理与质控(Demultiplexing、Artifact Filtering、Isoform Classification 等)

  二、中游:表达定量与细胞分析(Isoform Quantification、Cell Type Annotation、Integration 等)

  三、下游核心分析:差异异构体分析(区分基因驱动 vs. 异构体驱动)、可变剪接与末端使用、基因融合检测、突变检测

  四、功能验证与结构预测(GO/KEGG 富集、AlphaFold3 蛋白结构预测、PPI 网络、sQTL 分析等)

  五、跨条件与跨物种比较(发育轨迹、跨脑区比较、跨物种保守性)

  ---
  一句话总结:目前的分析链路可概括为「预处理质控 → 异构体定量 → 细胞注释 → 差异异构体分析 → 融合/突变检测 → 结构域/蛋白功能预测 → 多维度比较」,其核心区别于短读长分析的是:分析粒度从基因下沉到异构体,且需要回答「观察到的差异是源于基因表达变化还是异构体特异性调控」这一本质问题。

✻ Churned for 40s

────────────────────────────────────────────────────────────────────────────────────────────────────────────────────────────────────────────────────────────────────────────────────────────────────────────────────────────────
❯
────────────────────────────────────────────────────────────────────────────────────────────────────────────────────────────────────────────────────────────────────────────────────────────────────────────────────────────────
  ? for shortcuts
过程中即使可能有问题,agent 也会自己去解决的。
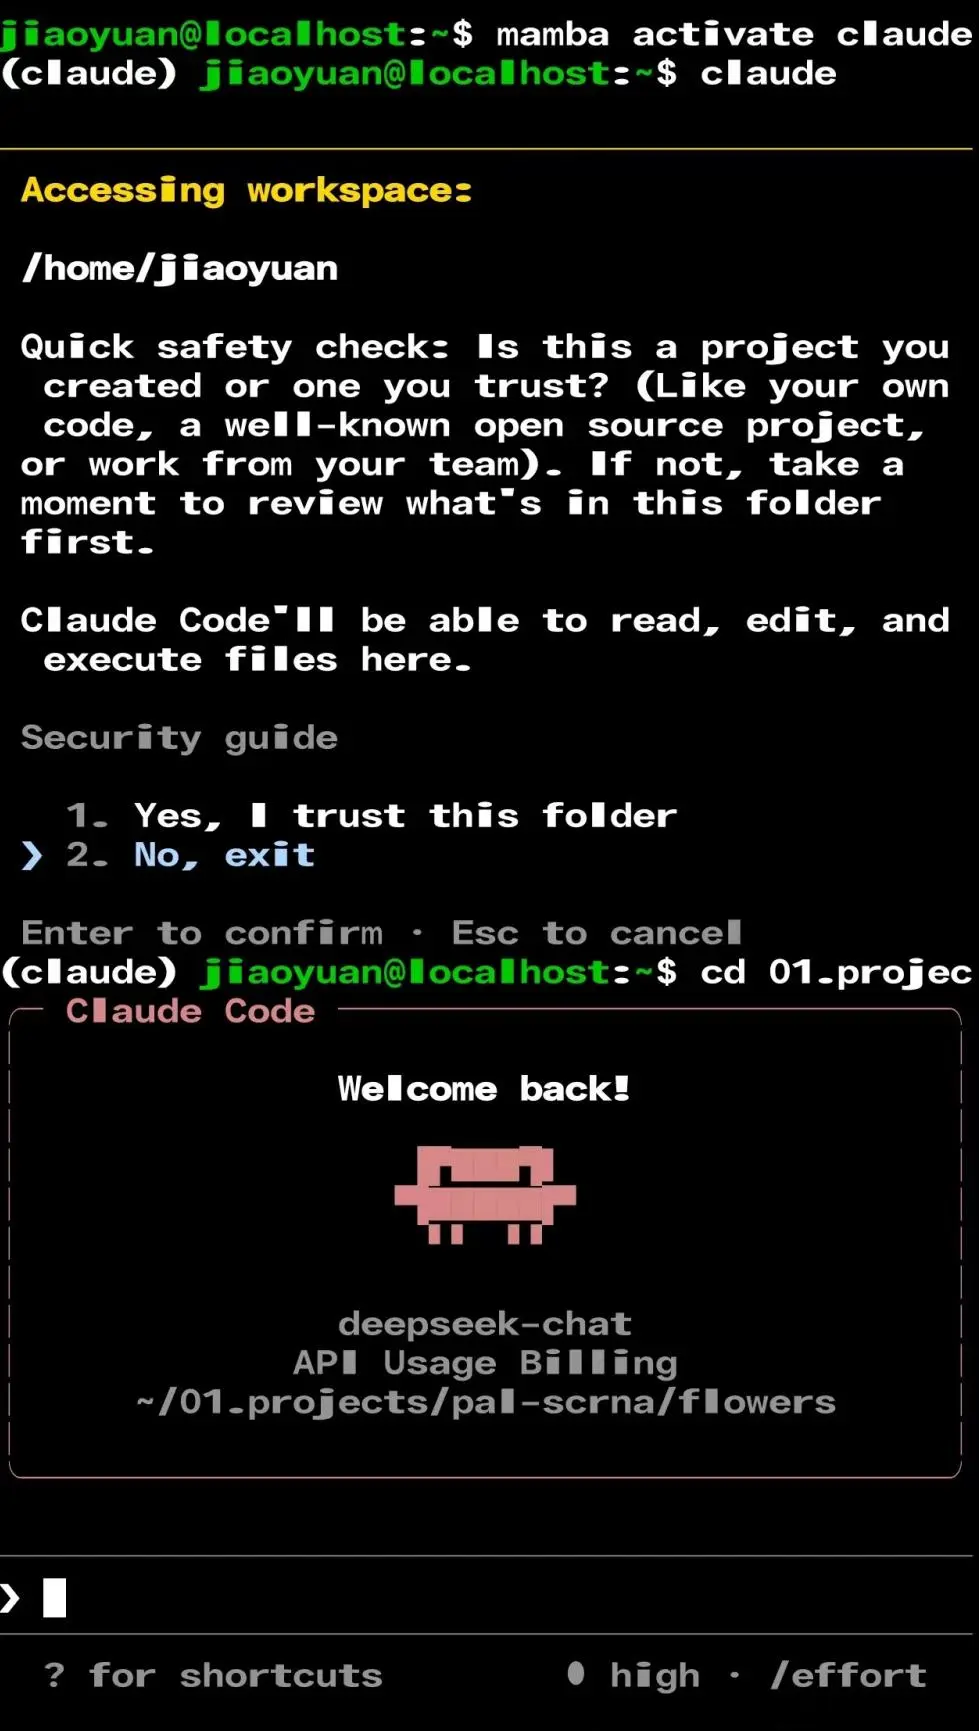
那么既然现在可以让 agent 去跑流程,我们只需要写几行字的话,那么,用手机来控制 agent 是不是更酷?当然,只是跑简单流程,复杂的还是要自己确认清楚。
安卓手机可以使用 termux,一个安卓端的终端模拟器,GitHub 项目地址是 https://github.com/termux/termux-app
安装好以后装一个 openssh:
pkg install openssh这样以后我们就可以使用手机 ssh 连接服务器,然后控制 agent 去给我们提交任务了~